

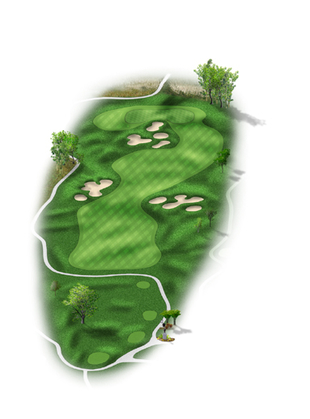
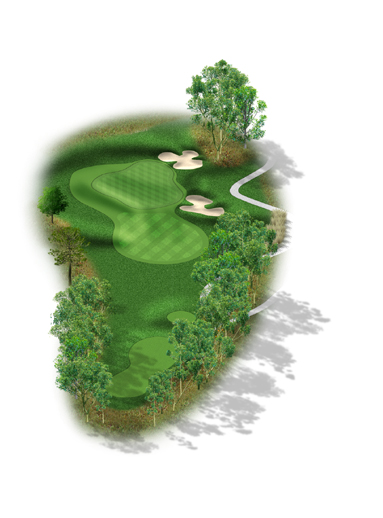
Jasper Greens
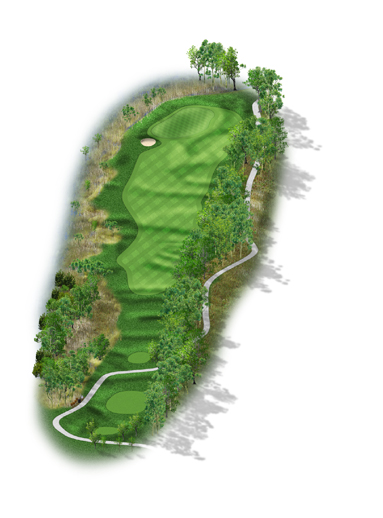
Irish troops from Savannah fought in many of this country’s wars. Sometimes seen as the underdog and often overlooked, those soldiers, like this hole, represented a lurking threat. Length is not an issue here, as this hole plays the shortest of all par fours. A true course and a steady hand, however, will see you safely through its perils. Do all you can to approach this green from the fairway, as the putting surface is pinched and severely sloped in the middle. Balls hit to this spot need to be perfectly played in order to hold the green. Shots that are long leave a harsh up and down. Shots that are short will find one of three bunkers that guard the green’s entryway.
| black | 338 Yards | 17 Handicap |
| gold | 303 Yards | 17 Handicap |
| silver | 273 Yards | 17 Handicap |
| jade | 229 Yards | 17 Handicap |
Hussar’s Relief
Much like the Historical Cavalry Units of Savannah, the Hussars, this hole can be played with a steady march straight up the middle. A deviation in to the trees right or marsh left will only hinder your progress and frustrate your cause. A well-placed drive will leave you with a shot to the green that can either be flown in or run right up the center. Be wary of your yardage here as the flat, rolling flow of the hole can be deceiving. Any balls reaching the green will have an excellent chance of scoring well.
| black | 459 Yards | 7 Handicap |
| gold | 427 Yards | 7 Handicap |
| silver | 384 Yards | 7 Handicap |
| jade | 324 Yards | 7 Handicap |
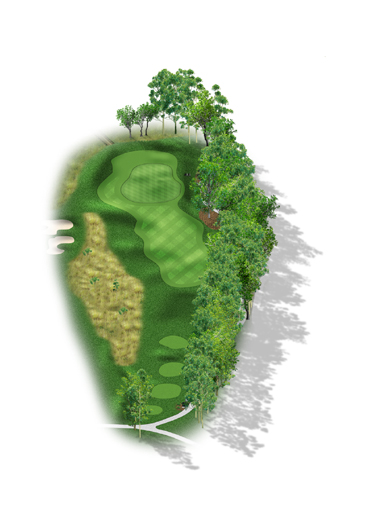
Monterey Square
The longest par three on the course may prove to have a bite far less vicious than its bark. While it plays to over 230 yards from the black tee, its green can be forgiving both left and long! Don’t be fooled by Bob Cupp’s clever design. The bunkers you see over the green are actually the features of another hole. Anywhere on or around the putting surface will allow for a very playable chip shot and an excellent chance at par.
| black | 248 Yards | 9 Handicap |
| gold | 224 Yards | 9 Handicap |
| silver | 199 Yards | 9 Handicap |
| jade | 171 Yards | 9 Handicap |
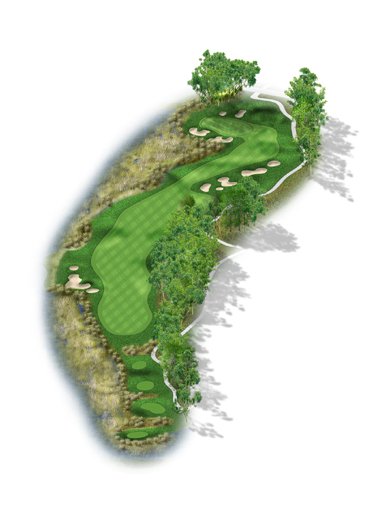
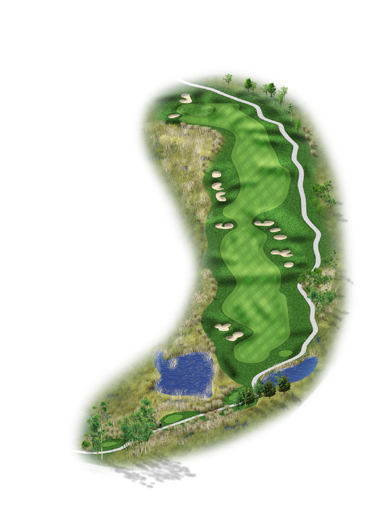
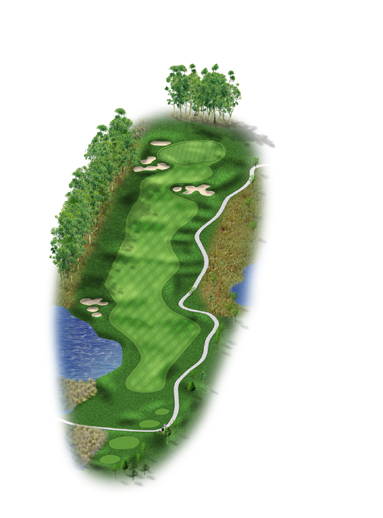
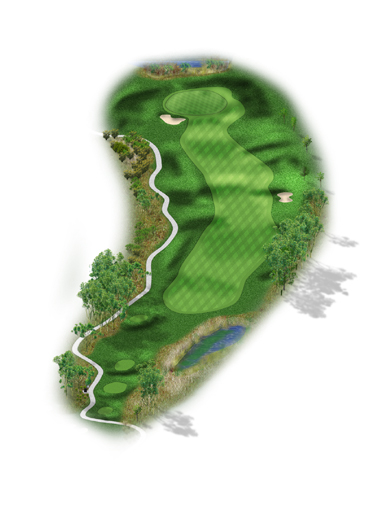
Good Anne’s Crossing
The ship and the voyage of James Oglethorpe inspired the name of this hole. Hugging a tidal marsh along its port side, Good Anne’s Crossing is relentless to those who favor a draw or worse, a hook. A fade that slips away can also be a nasty part of your journey, especially on the tee shot. If your drive finds the fairway, your chances for a good score are superb. Realize that there is plenty of room right of the green over the row of bunkers guarding its starboard entryway. The distance between the marsh and the bunkers is approximately 40 yards at its tightest spot. Approaches to this green are easier from the right, as the marsh pinches the fairway directly in front of the putting surface, making it an almost island green to those shots from the center of the fairway.
| black | 533 Yards | 5 Handicap |
| gold | 487 Yards | 5 Handicap |
| silver | 445 Yards | 5 Handicap |
| jade | 413 Yards | 5 Handicap |
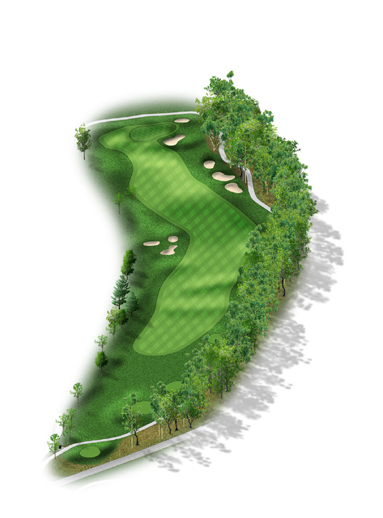
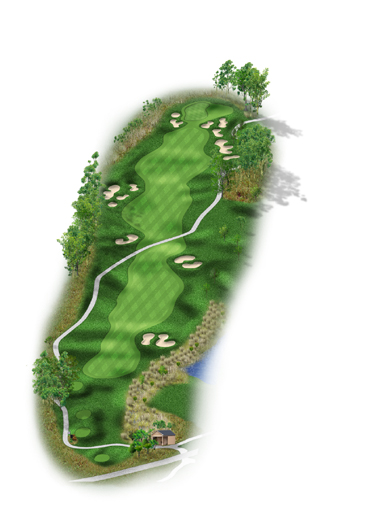
Moonshine’s Haven
As the name of the hole implies, this secluded area once hosted certain illegal activities! This par four gently bends from right to left and while the bunkers along the right side are not reachable from the tee, the ones along the left pose a threat. They are deep… and to reach the green from them demands a very skilled shot. This is one of the few holes where long is not a place where you may err. The Back River and South Carolina loom in the background waiting for the misplayed shot. The green slopes severely on the right side, corralling any balls that are hit there into a hollow. This hole rewards smart, steady play. Anything cute could result in a wave of trouble.
| black | 406 Yards | 13 Handicap |
| gold | 349 Yards | 13 Handicap |
| silver | 320 Yards | 13 Handicap |
| jade | 260 Yards | 13 Handicap |

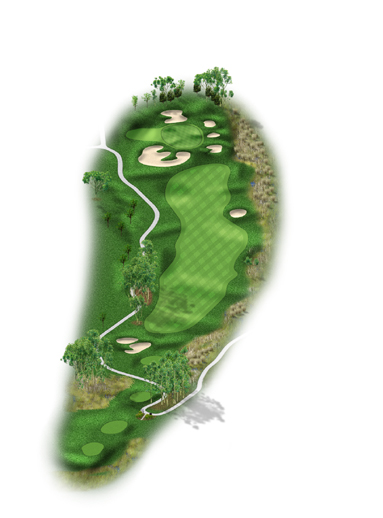
Talmadge Peaks
ANo margin for error on this long par four. The tee ball needs enough length to peek around the corner of this dogleg right. However, to hit it too far means certain trouble as a deep bunker guards the corner of the bend. Balls that do find the fairway face a daunting shot to a small elevated green that is guarded by bunkers and marsh. The green sits under the shadow of the peaks of the Talmadge Bridge – your gateway to the remainder of your voyage.
| black | 447 Yards | 3 Handicap |
| gold | 408 Yards | 3 Handicap |
| silver | 375 Yards | 3 Handicap |
| jade | 332 Yards | 3 Handicap |
Big Duke
Be wary the wreckage ahead. There will be many a wanderer who makes safe passage to this spot only to be lost amid this monster par five. Don’t be fooled – while this hole is long, it is the accurate golfer who will find the path of least resistance. Favor the right side of the fairway off the tee, avoiding the bunkers on the left. If you do not think that you can clear the bunkers that pinch the fairway on your second shot, it is wise to lay up. Any ball that finds these bunkers is headed for a bogey or worse. Once you are past these hurdles, the hole softens. Favor the right side of the green on your approach and you should be able to finish the hole with relative ease. Take par and count your blessings.
| black | 660 Yards | 1 Handicap |
| gold | 599 Yards | 1 Handicap |
| silver | 558 Yards | 1 Handicap |
| jade | 447 Yards | 1 Handicap |
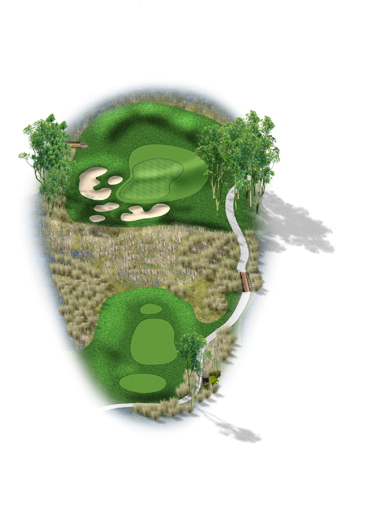
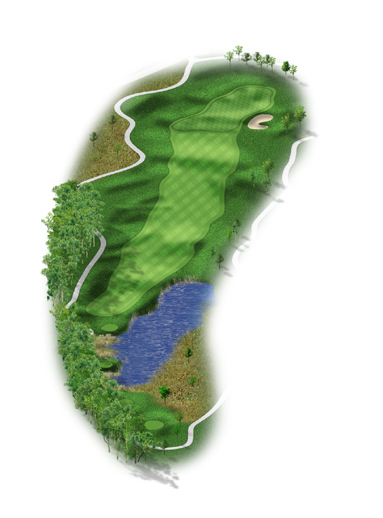
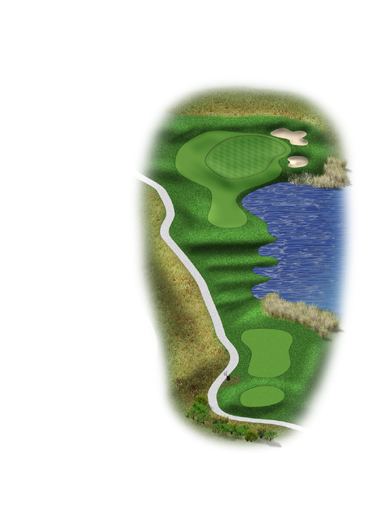
The Briar Patch
While this par three is short, it is the only forced carry on the golf course from all tees. The green is long from front to back with a large roll off area behind. There is no reason to be short here – that is where the trouble lurks. Great birdie opportunity if you do not become too intimidated by the marsh that stands between you and the hole.
| black | 172 Yards | 11 Handicap |
| gold | 132 Yards | 11 Handicap |
| silver | 117 Yards | 11 Handicap |
| jade | 106 Yards | 11 Handicap |
Harbor Light
In the distance, through the mist and fog, you will discern the shape of a well protected green and The Westin Savannah Harbor Golf Resort & Spa in the backdrop. This tricky par four concludes the first half of today’s Troon Golf Experience. For the long hitter, aim at the bunkers on the left. This should be your path to the green. A good tee ball will leave you a short iron shot in. Shorter hitters have more room right. However, this leaves a longer shot to the putting surface. The green is well protected on all sides by bunkers and its elevation makes a high lofted shot preferable. Its undulations also make putting a challenge. Tread carefully.
| black | 420 Yards | 11 Handicap |
| gold | 381 Yards | 11 Handicap |
| silver | 343 Yards | 11 Handicap |
| jade293 Yards | 11 Handicap | 106 Yards | 11 Handicap |
Slammin’ Sammy
“Slammin’ Sam” Snead could hit the ball a country mile with a swing that was the sweetest in golf. He recorded 81 PGA Tour victories as testament to his skills. You are encouraged to mimic Slammin’ Sammy and hit your best long, straight drive on this hole. By clearing the fairway bunkers from the tees, you’ll set yourself up for a very approachable green and pleasant opening leg to the back nine. With plenty of room behind, the only obstacle on your approach is the large bunker that fronts this kidney-shaped green.
| black | 386 Yards | 16 Handicap |
| gold | 363 Yards | 16 Handicap |
| silver | 323 Yards | 16 Handicap |
| jade293 Yards | 11 Handicap | 272 Yards | 16 Handicap |
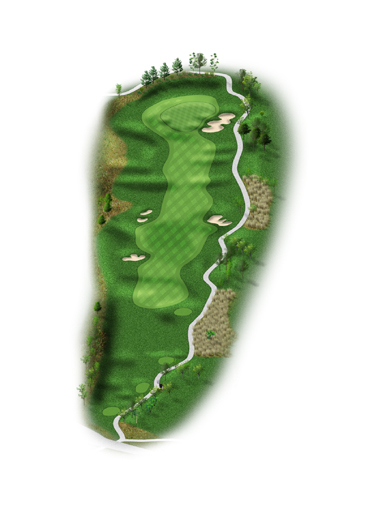
Mulberry Grove
Named for a Historic Plantation, this hole has a welcome feel, as the tee shot is spacious. It narrows, however, as you approach the green. Be wary of the bunkers on the right – they are not as close to the green as they appear and can collect a poorly executed second shot. The large, flat green should yield birdies to those who reach it in regulation.
| black | 530 Yards | Handicap 10 |
| gold | 499 Yards | Handicap 10 |
| silver | 468 Yards | Handicap 10 |
| jade293 Yards | 11 Handicap | 447 Yards | Handicap 10 |
Tomo Chi Chi
Much like the seven-foot tall Savannah Indian Chief for which it was named, this hole’s most noticeable feature is its size. Not only a strong test of the driver, but the second shot must also be well thought out as you approach this 17,000 square foot green. Putting from the wrong spot has left many a passenger scratching their heads and longing for smoother waters.
| black | 468 Yards | 4 Handicap |
| gold | 434 Yards | 4 Handicap |
| silver | 377 Yards | 4 Handicap |
| jade293 Yards | 11 Handicap | 324 Yards | 4 Handicap |
The Waving Girl
Your first goal on this par five should be avoiding the fairway bunkers from the tee. If you enter one of these, reaching this green in regulation becomes very difficult. Recognize that your second shot will be damaged left or right, so play cautiously. Guarding this small, bi-level green are a series of cavernous bunkers. Only the most lofted of approach shots will avoid these and hold the green. If you are going to miss your approach shot, long and right offers relief, while long and left ends your safe
| black | 595 Yards | 2 Handicap |
| gold | 548 Yards | 2 Handicap |
| silver | 515 Yards | 2 Handicap |
| jade293 Yards | 11 Handicap | 471 Yards | 2 Handicap |
Alligator Alley
The narrow passageway on this hole serves as both our fairway as well as the natural path for our native alligators when crossing the course. A careful decision needs to be made on this tee box. Hit driver and risk the perils that line this hole…yet…if successful, leaves you a small pitch to the green. Or play safe with an iron and find yourself in the rolling mounds of the fairway. An approach shot right of the green leaves a tricky, downhill chip. A shot missed left could lead to a more costly fate.
| black | 324 Yards | 12 Handicap |
| gold | 292 Yards | 12 Handicap |
| silver | 284 Yards | 12 Handicap |
| jade293 Yards | 11 Handicap | 247 Yards | 12 Handicap |
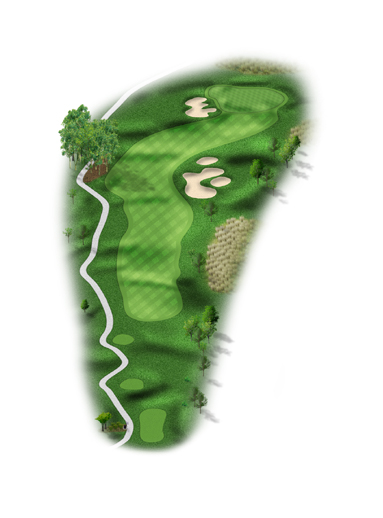
Battery Point
Tucked into its own corner of the world, this hole offers a tranquil port as you proceed along your voyage. This straightforward par three is generous left and long. It shows its teeth short and right. A well played shot to the middle of the green should allow for a good chance for birdie in any direction. A par should right your sails for the waters ahead.
| black | 172 Yards | 18 Handicap |
| gold | 154 Yards | 18 Handicap |
| silver | 132 Yards | 18 Handicap |
| jade293 Yards | 11 Handicap | 109 Yards | 18 Handicap |
Washington’s Guns
George Washington won two brass cannons from the British during the Revolutionary War. The guns were shipped to Savannah and remain proudly displayed. One would have use for these cannon on this hole, as to reach its green in regulation requires two lengthy shots. A tee shot slightly left of the fairway bunker will leave you a mid-iron approach to a green guarded by a front left bunker. The green is crowned, so any shot not on target will have the tendency to roll off onto the surrounding collar. Par here is an excellent score.
| black | 459 Yards | 6 Handicap |
| gold | 422 Yards | 6 Handicap |
| silver | 388 Yards | 6 Handicap |
| jade293 Yards | 11 Handicap | 327 Yards | 6 Handicap |
Yamacraw Bluff
Stand on the tee and survey what lies ahead. James Oglethorpe did the same in 1733 from that point on the shore that provided the name for this hole. He looked out over what would become the Historic District of Savannah. What you will see is a large, guarded green that offers relief only to those who stay clear of the right and favor the left. Brave is the soul who takes dead aim at the pin, but great is the reward for those who succeed. A birdie here is like favorable current or strong tailwind that puts you ahead of the rest of the fleet.
| black | 214 Yards | 14 Handicap |
| gold | 186 Yards | 14 Handicap |
| silver | 172 Yards | 14 Handicap |
| jade293 Yards | 11 Handicap | 158 Yards | 14 Handicap |
Wormsloe
The first and most successful plantation in Savannah provides the namesake for this hole. A long stretch of fairway stands between you and the end of your journey. Be cautious with your tee shot as fairway bunkers on both sides will come into play and make reaching this green in regulation very difficult. Another challenge on this hole is the approach shot, as the green is crowned and well protected from shots on the right by a severe bunker. There is plenty of room long and left, but the chip shot back up to the sloping green makes par a challenging score.
| black | 457 Yards | 8 Handicap |
| gold | 419 Yards | 8 Handicap |
| silver | 375 Yards | 8 Handicap |
| jade293 Yards | 11 Handicap | 301 Yards | 8 Handicap |